

Basement flooding and moisture intrusion cause severe structural damage, wood rot, and toxic mold growth in residential buildings. A sump pump serves as the primary line of defense against groundwater accumulation, collecting excess water from around the foundation footing and pumping it safely away from the home. Whether replacing an outdated unit or installing a completely new system from scratch, understanding proper installation techniques and routine testing protocols ensures your basement remains dry during heavy storms and seasonal thaws.
Understanding Sump Pump System Configurations
Before beginning an installation project, selecting the right pump design and understanding the essential system components is critical for long-term performance.
Submersible versus Pedestal Pumps
-
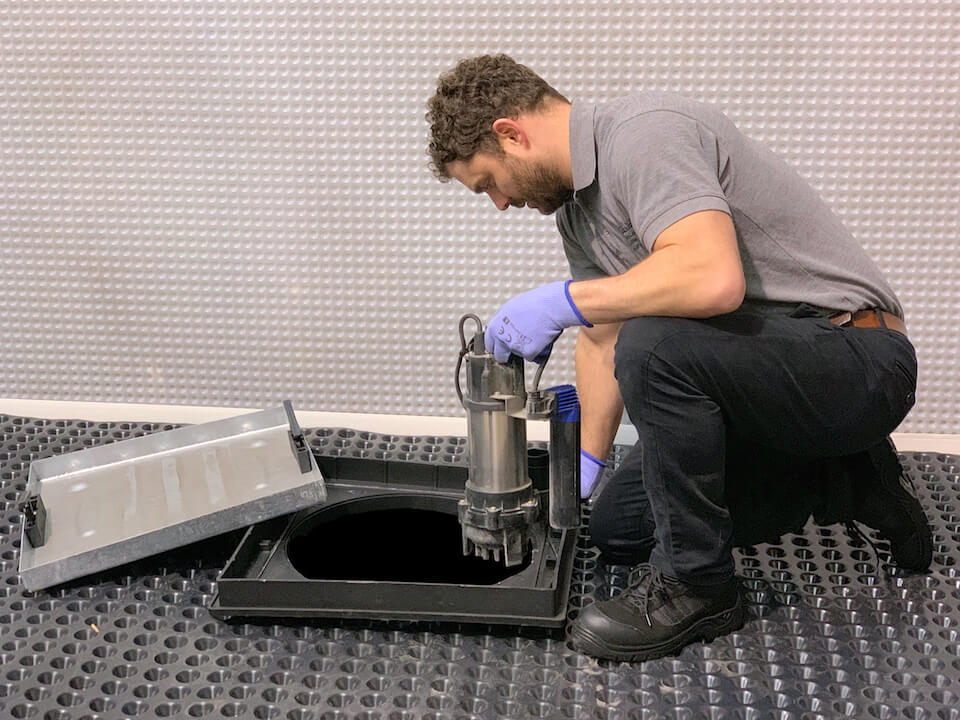
Submersible Sump Pumps: Submersible models feature a sealed motor assembly designed to rest directly inside the bottom of the sump pit. Water completely surrounds the motor casing during operation, which helps cool the unit during prolonged pumping sessions. Submersible pumps operate significantly quieter than pedestal models and allow the sump pit to be covered with a tight-fitting sealed lid, keeping noise and moisture contained.
-
Pedestal Sump Pumps: Pedestal units position the electric motor on a tall column above the top of the sump basin, keeping the motor dry while an extended impeller shaft reaches down into the pit water. While pedestal pumps are easier to service and generally have a longer motor lifespan due to reduced exposure to moisture, they operate with noticeable motor noise and require an open or specially notched basin cover.
Core Components of a Complete Sump System
-
Sump Basin (Pit Liner): A heavy-duty plastic or structural foam basin installed below the basement floor grade to collect groundwater drained from foundation weeping tiles or sub-slab gravel beds.
-
Float Switch: A mechanical or electronic sensor that detects water height inside the basin. As water rises, the float elevates to trigger the motor switch, deactivating it once the water level drops back to a preset resting point.
-
Check Valve: A one-way mechanical valve installed on the vertical discharge pipe just above the pump exit port. It prevents pumped water remaining in the vertical pipe from flowing back into the pit when the motor shuts off.
-
Discharge Piping: Rigid schedule 40 PVC piping that carries pumped water up out of the basin, through the exterior rim joist or wall, and away from the home foundation.
Step-by-Step Sump Pump Installation Process
Installing a sump pump system requires basic plumbing skills, masonry cutting tools, and attention to proper grade and slope measurements.
Selecting the Location and Preparing the Basin
Identify the lowest point in the basement floor where water naturally accumulates or where interior perimeter drain tiles converge. Ensure the chosen location sits at least eight inches away from foundation walls to avoid cutting into the internal footing lip.
-
Mark a circle on the concrete slab that measures approximately four to six inches wider than the outer diameter of your plastic sump basin.
-
Use a rotary hammer drill or concrete saw to break through the concrete slab along your marked perimeter line.
-
Excavate soil and gravel underneath the slab until the hole is deep enough to accommodate the full height of the basin plus a four-inch base layer of coarse gravel.
Bedding and Setting the Sump Basin
-
Pour a four-inch layer of crushed coarse stone or washed gravel into the bottom of the excavated hole to establish a stable, level foundation for the basin.
-
If using a perforated basin designed to collect sub-slab water, ensure the side perforations line up with incoming perimeter drain tiles.
-
Lower the plastic basin into the pit and double-check that the top lip sits flush with or slightly below the surface of the surrounding concrete floor slab.
-
Backfill the open gap around the outside perimeter of the basin with crushed stone up to within two inches of the top concrete edge.
-
Fill the remaining top two inches around the basin with concrete mix, troweling it smooth so it blends evenly into the existing basement floor.
Plumbing the Discharge Line and Anti-Airlock Relief
Place the sump pump firmly on the gravel bed at the bottom of the basin, ensuring it stands perfectly upright and that the float switch moves freely without contacting the basin walls.
-
Thread the Adapter: Thread a male PVC adapter into the pump discharge port using Teflon thread sealant tape to ensure a watertight seal without overtightening plastic threads.
-
Drill the Relief Hole: Drill a three-sixteenth-inch anti-airlock weep hole into the vertical PVC discharge pipe approximately two to three inches above the pump outlet threads. This hole prevents trapped air pockets from stalling the pump impeller when the basin fills.
-
Install the Check Valve: Glue a short section of rigid PVC pipe into the pump adapter, then install a rubber-booted inline check valve above the weep hole. Orient the directional flow arrow on the check valve body facing upward toward the exterior exit path.
-
Route Exterior Piping: Extend the vertical discharge pipe up toward the ceiling, transition with a ninety-degree elbow, and pass through a hole drilled through the rim joist using a hole saw. Exterior piping should slope downward away from the house at a minimum slope of one-quarter inch per foot to ensure complete drainage.
Electrical Wiring and Power Supply Setup
Sump pumps require a dedicated 15-amp or 20-amp electrical circuit protected by a Ground Fault Circuit Interrupter (GFCI) outlet.
-
Plug the pump directly into the GFCI receptacle located near the sump pit.
-
Never use extension cords, power strips, or ungrounded adapters, as high initial motor startup amperage can melt cords or trip standard circuit breakers.
-
Secure power cords to the vertical discharge pipe using zip ties, keeping excess cord slack clear of the floating mechanical switch mechanism.
Comprehensive Testing and Maintenance Protocols
Routine testing ensures that your sump pump will engage automatically when severe weather strikes.
The Water Bucket Test Procedure
The simplest way to verify system operation is by performing a manual water test at least twice a year.
-
Disconnect the main basin lid or open the access port to view the interior pit clearly.
-
Slowly pour five to seven gallons of clean water directly into the sump basin using a large bucket.
-
Observe the water level as it rises around the pump. The float switch should lift naturally and engage the pump motor when the water level reaches approximately eight to twelve inches deep.
-
Verify that the pump empties the pit rapidly, shutting off smoothly when the float drops back down to its lower resting limit.
-
Watch the check valve area during shutoff to confirm no water leaks out of the pipe coupling sleeves and no loud clunking water hammer occurs.
Cleaning the Intake Screen and Basin Debris
Silt, sand, small pebbles, and laundry lint collect at the bottom of the basin over time, which can clog the lower intake screen and burn out the motor.
-
Disconnect electrical power by unplugging the unit from the wall outlet before placing hands inside the basin.
-
Lift the pump out of the basin periodically to inspect the plastic or cast-iron intake screen at the base.
-
Clear away trapped debris, rust scale, and mud using a stiff nylon brush and a garden hose spray nozzle.
-
Scoop out accumulated sediment from the bottom of the sump basin before re-installing the pump.
Testing Battery Backup Systems
Primary electric pumps fail during major storms if local grid power goes out. Installing a secondary battery backup pump protects the basement during electrical outages.
-
Test the backup pump monthly by temporarily unplugging the main primary pump from the GFCI wall outlet.
-
Pour water into the basin until the higher secondary float switch activates the battery-powered backup unit.
-
Check the battery fluid levels on lead-acid marine batteries and top off cells with distilled water if plates are exposed.
-
Verify that smart battery chargers show full charge status indicators without warning lights or alarm tones.
Troubleshooting Common Sump Pump Operational Faults
Recognizing early warning signs of mechanical failure helps prevent sudden basement flooding.
Continuous Running or Frequent Cycling
-
Stuck Float Switch: The most common cause of continuous running is a float switch caught against the side wall of the pit liner or tangled in power cords. Re-orient the pump base to clear the float path.
-
Defective Check Valve: If water flows continuously back down into the pit every time the pump stops, the internal flap on the check valve may be stuck open with debris, forcing the pump to re-pump the same water repeatedly.
-
Excessive Inflow: During extreme high-water table conditions, incoming groundwater may enter faster than a low-horsepower unit can discharge, requiring an upgrade to a higher gallon-per-hour capacity pump.
Failure to Turn On During Heavy Rain
-
Tripped GFCI Outlet: Damp basement conditions or motor current spikes can trip the wall outlet. Reset the outlet button and inspect for electrical shorts.
-
Burnt Motor Winding: If the pump hums loudly without spinning or moving water, the internal capacitor or motor impeller may be jammed with gravel or burned out entirely.
-
Failed Float Mechanism: Mechanical float arms eventually wear out or lose buoyancy due to water penetration, requiring replacement of the switch module.
Frequently Asked Questions
What is the expected lifespan of a residential sump pump?
A high-quality cast-iron submersible sump pump typically lasts between seven and ten years with regular maintenance. Plastic pedestal pumps or lower-tier models exposed to heavy continuous use may require replacement after three to five years. Replacing a unit proactively around the seven-year mark prevents unexpected pump failures during major rainstorms.
Can a sump pump system be installed in a crawl space instead of a full basement?
Yes, sump pumps are commonly installed in dirt or gravel crawl spaces to mitigate standing water and reduce structural humidity. In crawl space applications, it is crucial to use a fully sealed basin liner with a bolted gasket lid to prevent soil gases, moisture vapor, and foul odors from evaporating up into the living spaces above.
What horsepower size sump pump is recommended for standard homes?
For most average-sized residential basements with moderate groundwater accumulation, a one-third horsepower (1/3 HP) pump is standard. If your home sits on a high water table, experiences heavy regional rainfall, or must pump water up a vertical height greater than ten feet, a one-half horsepower (1/2 HP) pump provides the extra flow capacity needed.
Why is an anti-airlock relief hole necessary on the discharge line?
When a sump pit drains completely, air enters the lower pump housing chamber. As water fills the basin again, that trapped air gets compressed between the rising water level and the closed check valve above. Without a small relief hole drilled below the check valve, this air pocket prevents the impeller from pushing water upward, causing the pump to run dry and overheat.
How do you prevent exterior sump pump discharge pipes from freezing in winter?
To prevent winter freezing, transition the exterior discharge line into a wider diameter pipe (such as extending from 1.5-inch to 3-inch pipe) as soon as it exits the house foundation. Ensure the line maintains a steep downward slope away from the building, and install a gravity-operated freeze relief device near the wall exit so water can escape even if the end of the line becomes blocked with ice.
How does a water-powered backup sump pump differ from a battery backup system?
A water-powered backup pump uses water pressure from your home’s municipal water line to create a vacuum suction venturi that pulls pit water up and out without needing electrical power or batteries. While water-powered units can operate indefinitely during power outages, they require strong municipal water pressure, consume fresh city water during operation, and cannot be used on private well water systems.
Why does a sump pump GFCI outlet trip unexpectedly, and how can it be fixed?
GFCI outlets trip when they detect microscopic electrical current leakage to the ground, which frequently occurs as pump motor seals age and allow moisture near internal electrical windings. Additionally, high startup power spikes from cycling motors can cause nuisance tripping. If an outlet trips repeatedly after testing with other appliances, inspect the pump for internal seal failure or have an electrician verify circuit ground integrity.
Comments are closed.